I spend some of my time on Console. Frequently I use several CLI tools dotnet, kubectl, git, gh, and docker are just a few examples
.Net Cli tool helps us to create our cli executables, but you can simply ask, “why would I need that as I can create a console application and run it whenever I need to run” Advantage comes from the ease of distribution. You can install it with a simple command without carrying the executables around, users can update to a newer version easily, and you can publish your changes without hassle.
Dotnet CLI tools use Nuget to handle the distribution.
Like regular Nuget packages on any dotnet project, tools are hosted on (public or private) Nuget Repository.
Developer updates their codes and pushes their Nuget packages to the repository. A newer version can be consumed by the clients to update their current version.
As a consumer, if you install a tool, you install an executable from someone else. Every risk an executable has, the CLI Tool you have installed could have.
Please use tools from trusted sources.
Check if they have a source code repository you can review,
As a Creator, like any other exe, Tool can be decompiled, be careful about storing secrets in your application.
Keep source code and CI-CD pipelines open and accessible. You will increase the trust in the Tool you have created if people can review
Let’s Start Writing our Tool,
1- Create a new Console App.
You can use VsCode or Visual Studio doesn’t matter.
2- Write your Console app as you write it any day.
If you are dealing with arguments, I will suggest you use CommandLineParser. This NuGet package will make handling arguments a breeze (you can thank me later. )
If you are looking for an example check my repo: https://github.com/mmercan/dotnet.cli.tools.passgen
When you are done with your console app, changing your console app to a Tool is very simple. There are only three changes required on the csproj file.
1 – Declare the project as a Tool
<PackAsTool>true</PackAsTool>2 – Location of the nupkg file, which we will push to NuGet
<PackageOutputPath>./nupkg</PackageOutputPath>3- Command’s name
<ToolCommandName>passgen</ToolCommandName>4- You may want to add a Version tag for updating the version of your Nuget package
<Version>1.0.1</Version>Now we have what we need to release it to the world
First, open a PowerShell or Terminal window and go to your project Folder.
Run pack dotnet c it with dotnet pack command

“dotnet pack” will create a nupkg folder and NuGet package
Go to the nupkg folder and run
nuget push Mercan.PassGen.1.0.0.nupkg -source https://api.nuget.org/v3/index.json -ApiKey {your nuget key}
Now you have successfully released your Tool to the Nuget repository, before installing the Tool check it at https://www.nuget.org/
(If the package hasn’t been published yet, Click Manage package and select “List in search results.”)

The NuGet website will give you an idea of how to install the Tool and Copy and Paste it to a Terminal. Now you have installed the Tool
(If you have restrictions on where you run executables you can add “–tool-path” to the dotnet tool install and add the path you would like to install the package, if the path is Added to the Environment variables Path list, everything will work as expected.) more details : https://docs.microsoft.com/en-us/dotnet/core/tools/dotnet-tool-install
dotnet tool install --global Mercan.PassGen --version 1.0.1
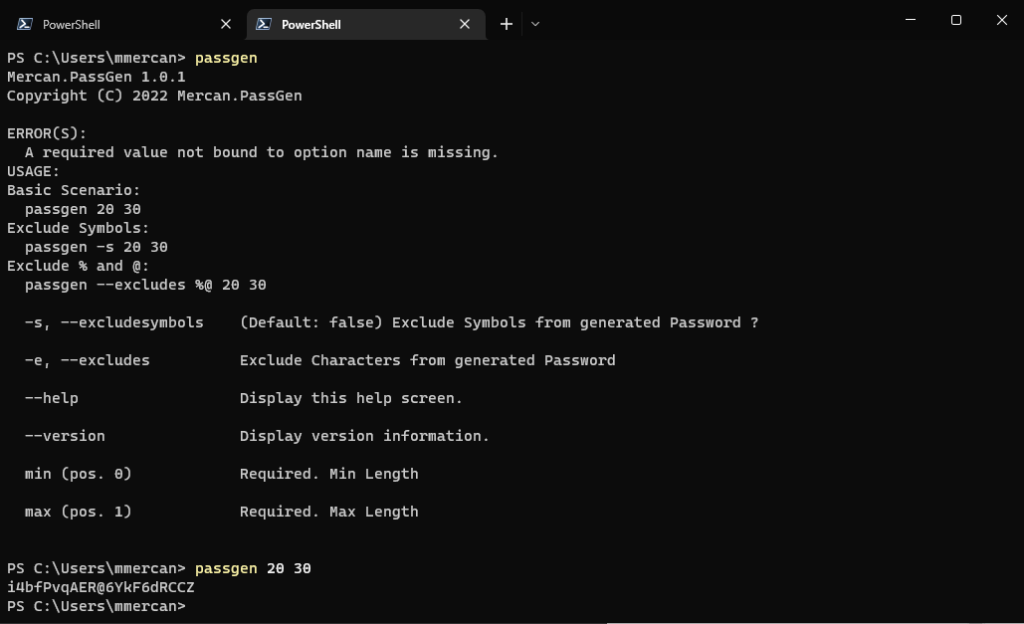
lets run the tool by calling it with the name we have provided on “ToolCommandName” tag
you can use
dotnet tool list –global list all global tools,
dotnet tool update –global <packagename> to update it,
dotnet tool uninstall –global <packagename> to uninstall it